How to Upload Files Into a Folder in Github
#StandWithUkraine - Stop the Russian invasion
Join u.s.a. and donate. All 2022 book royalties will be donated to:
Salvage Life in Ukraine and Ukraine Humanitarian Appeal.
Create a New Repo and Upload Files on GitHub
At present that you've fabricated a re-create of our GitHub template, the next pace is to learn how to create a brand-new repo and upload files. These skills will be helpful for several scenarios. Starting time, if yous take to fork a repo, which GitHub allows you to practise only one time, this method will allow you to create boosted copies. Second, you'll need to upload some of your own files when creating data visualizations using Chart.js and Highcharts templates in Affiliate 11 and Leaflet map templates in Chapter 12. Once again, we'll demonstrate how to do all of these steps in GitHub'southward beginner-level browser interface, but see the next section on GitHub Desktop for an intermediate-level interface that's more efficient for working with code templates.
In the previous section, you created a copy of our GitHub repo with the Employ this template button, and we intentionally set up up our repos with this newer feature because it allows the user to brand multiple copies and assign each i a different name. Many other GitHub repos practice non include a Template push, and then to copy those you lot'll need to click the Fork button, which automatically generates a copy with the same repo name as the original. But what if y'all wish to fork someone'due south repo a second time? GitHub prevents yous from creating a second fork to avoid violating 1 of its important rules: every repo in your business relationship must have a unique name, to avoid overwriting and erasing your work.
So how do you make a second fork of a GitHub repo, if in that location's no Use this template push button? Follow our recommended workaround that'south summarized in these three steps:
- Download the existing GitHub repo to your local computer
- Create a brand-new GitHub repo with a new name
- Upload the existing code repo files to your make-new repo
- Click on the Code > Download Zip drop-down menu push button on any repo, equally shown in Figure 10.12. Your browser will download a zipped compressed folder with the contents of the repo to your local computer, and it may ask you where y'all wish to save it. Determine on a location and click OK.
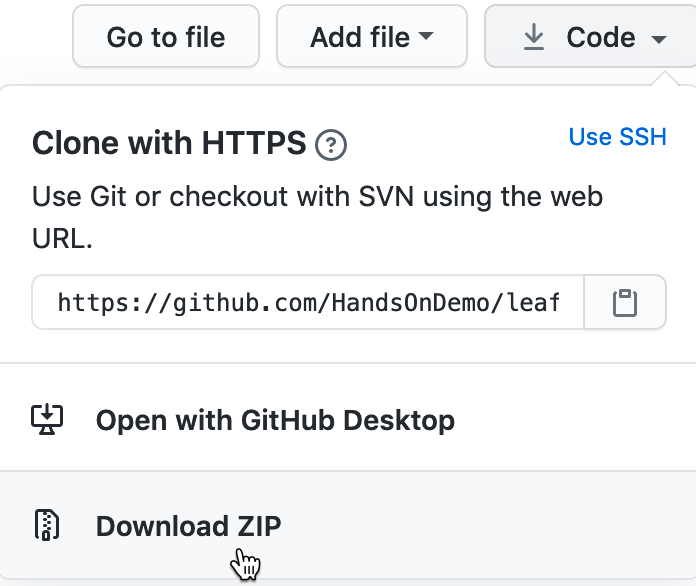
Figure ten.12: Click Code and select Download Naught to create a compressed folder of a repo on your estimator.
-
Navigate to the location on your computer where yous saved the folder. Its file name should end with
.zip, which means yous need to double-click to "unzip" or de-shrink the folder. After you unzip it, a new folder volition appear named in this format,REPOSITORY-Co-operative, which refers to the repository proper name (such asleaflet-map-unproblematic) and the branch name (such every bitmain), and it volition contain the repo files. Ane of those files is namedindex.html, which y'all'll apply in a few steps beneath. -
Go back to your GitHub account in your web browser, click on the plus (+) symbol in the upper-right corner of your account, and select New repository, every bit shown in Effigy x.13.
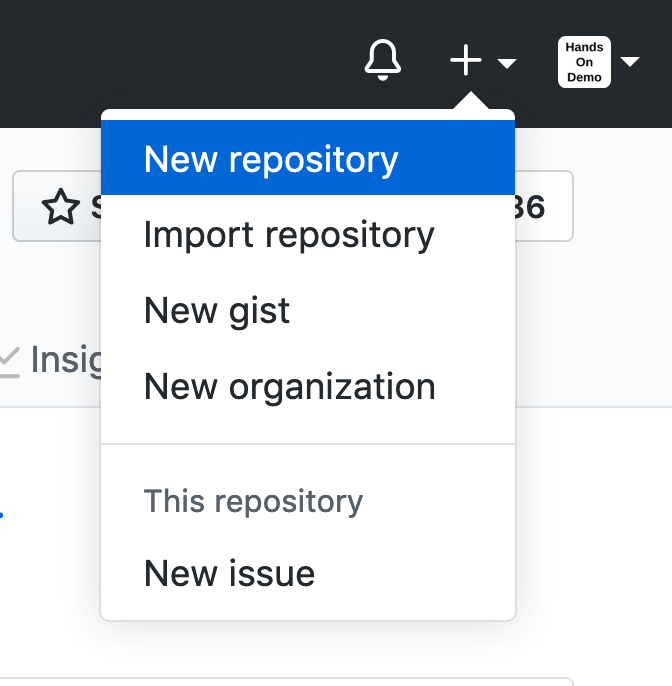
Figure 10.13: Click the plus (+) symbol in upper-correct corner to create a new repo.
- On the adjacent screen, GitHub will ask yous to enter a new repo name. Cull a brusk 1, preferably all lower-instance, and divide words with hyphens if needed. Allow'south name it
practicebecause nosotros'll delete it at the finish of this tutorial.
Check the box to Initialize this repository with a README to simplify the side by side steps.
Also, select Add a license that matches the code yous program to upload, which in this case is MIT License. Other fields are optional. Click the green Create Repository button at the bottom when washed, as shown in Figure 10.14.
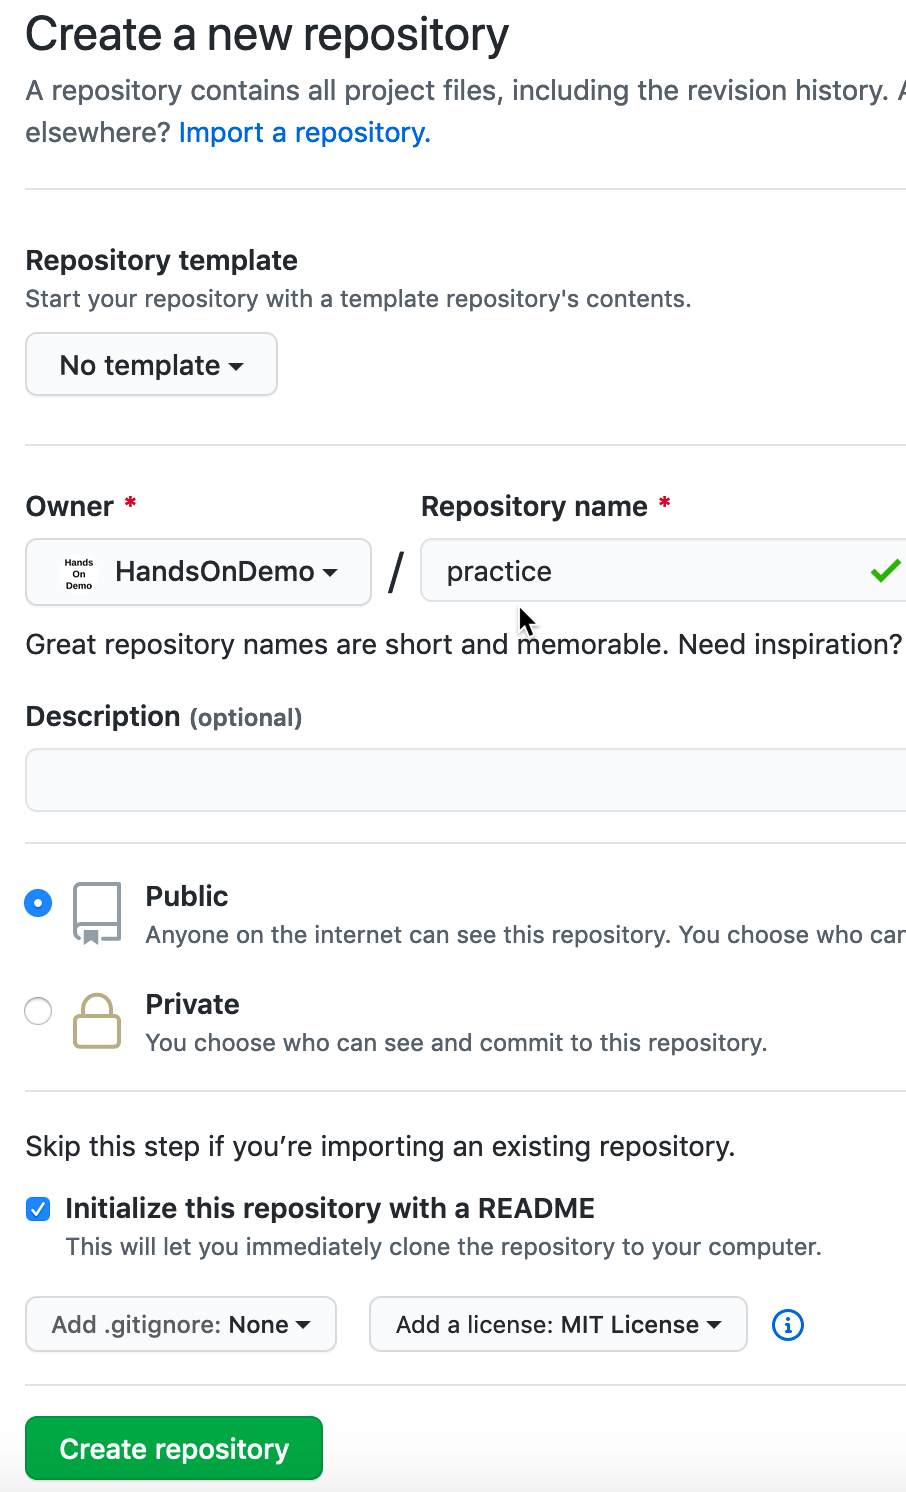
Figure ten.14: Name your new repo practise, check the box to Initialize this repo with a README, and Add together a license (select MIT) to friction match any code you plan to upload.
Your new repo will accept a web address similar to https://github.com/USERNAME/practice.
- On your new repo home folio, click the Add together File > Upload Files drop-down bill of fare push, virtually the middle of the screen, as shown in Figure 10.15.
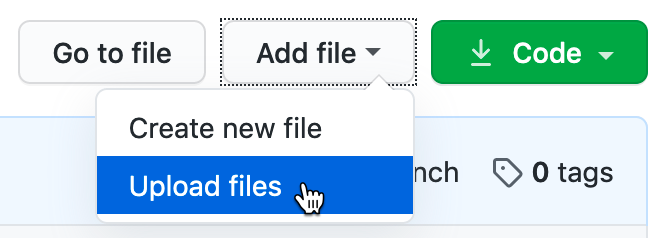
Figure 10.15: Click the Upload Files button.
- Inside the repo binder that you previously downloaded and unzipped on your local reckoner, drag-and-drop the
alphabetize.htmlfile to the upload screen of your GitHub repo in your browser, every bit shown in Figure 10.xvi. Practise not uploadLICENSEorREADME.docconsidering your new repo already contains those two files. Curl downwardly to click the green Commit Changes push.
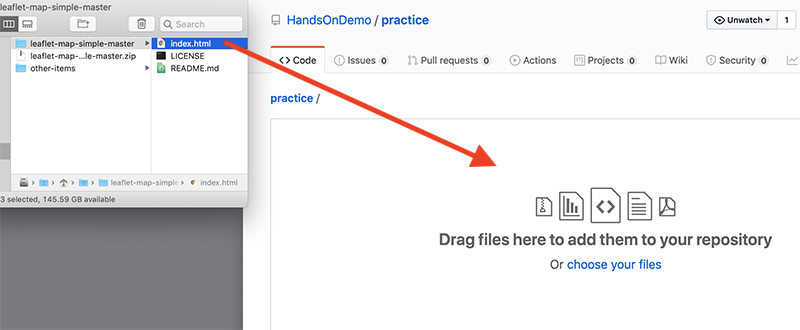
Effigy 10.xvi: Drag-and-drib the alphabetize.html file to the upload screen.
When the upload is complete, your repo should contain three files, now including a copy of the index.html lawmaking that you previously downloaded from the leaflet-map-simple template. This accomplished our goal of working around GitHub'due south one-fork rule, past creating a new repo and manually uploading a second copy of the code.
Optionally, you could utilize GitHub Pages to publish a live version of the code online, and paste the links to the live version at the top of your repo and your README.md file, every bit described in the Re-create, Edit, and Host a Simple Leaflet Map Template section of this affiliate.
- Since this was just a
practicerepo, let'south delete information technology from GitHub. In the repo screen of your browser, click the top-right Settings button, scroll all the way downwards to the Danger Zone, and click Delete this repository, every bit shown in Effigy x.17. GitHub will enquire you to type in your username and repo proper name to ensure that you lot really want to delete the repo, to prove you are not a drunken brownie chef.
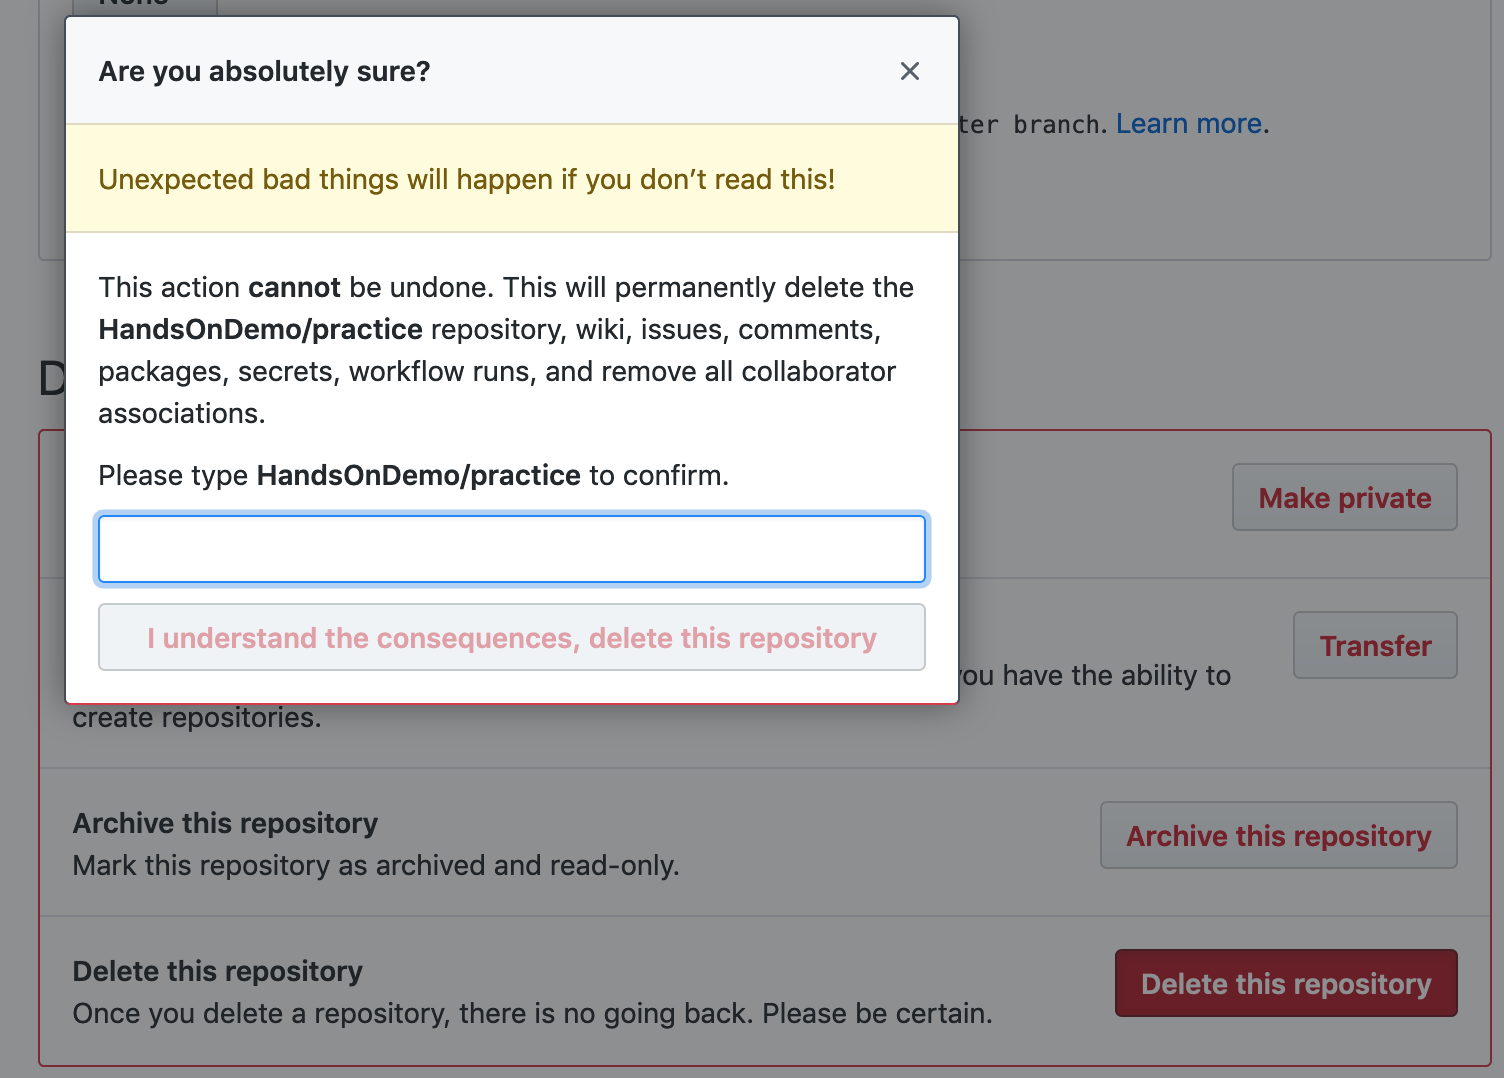
Figure x.17: Afterwards clicking the Delete Repository button, GitHub will ask you to blazon your username and repo name to confirm.
And then far, you've learned how to copy, edit, and host code using the GitHub web interface, which is a great introduction for beginners. Now you're set up to motility up to tools that will let you to piece of work more than efficiently with GitHub, such every bit GitHub Desktop and Atom Editor, to quickly move entire repos to your local computer, edit the lawmaking, and motion them dorsum online.
Source: https://handsondataviz.org/create-repo.html
Posting Komentar untuk "How to Upload Files Into a Folder in Github"